14 July, 2022

Saga: Romano-British

SOLD

I have a painted Romano-British 28mm army for sale.  It has never been used in a game.  It is 8 points for Saga.  The Britons are in the Saga Age of Invasions book.  They represent the forces of the post-Roman Britain/Arthurian period.  They could also be used with the Roman list in the Age of Invasion book.  The miniatures are a mixture of  Footsore, Gripping Beast and Crusader and most of the shields have LBMS decals.  

There are a total of 13 mounted and 38 foot miniatures and I am asking $448.  I also have a Early Saxon army for sale that makes a nice historical pair and two Viking armies.

They will be for sale at Historicon on July 21-24, 2022.  I will be in the flea market on Friday afternoon and Saturday morning.  I have comments on this post moderated so if you are interested you can give me your contact details through a comment without it posting publicly.

Warlord: King Arthur (or if you prefer Ambrosius Aurelianus), a great miniature only available from Footsore as part of a cavalry set.


1st unit of mounted hearthguard including a draco standard.


2nd unit of mounted hearthguard.

3rd unit of mounted hearthguard.


A warlord on foot as a deployment option, with another draco.


1st unit of foot hearthguard.  This can be combined with the other foot heathguard if you want another unit of warriors.

2nd unit of foot hearthguard.

1st unit of warriors, with a more uniformed 'Roman' look.

2nd unit of warriors, more of a local militia.

A unit of levy archers.

The army arrayed for battle.


15 March, 2022

Livestock and Objective Markers for Saga


Five of the scenarios contained in the Book of Battles supplement for Saga use either livestock or objective markers as part of the victory conditions.  I wanted to upgrade what I had available as part of my ongoing terrain improvement project.  I needed six bases of each type.  

Along with the ruins and rocky ground pieces I bought from Acheson Creations and which I posted recently, I also bought some resin pieces to use as objective markers.   After the usual washing with soap and spraying black, I painted them with several coats of Ceramcoat Terracotta, then a wash of GW Agrax Earthshade, followed by a matt varnish.  I painted watered-down glue on the bases, then dipped them in a tub of brown ballast.  After that dried, I used more glue to add patches of static grass and small bushes.

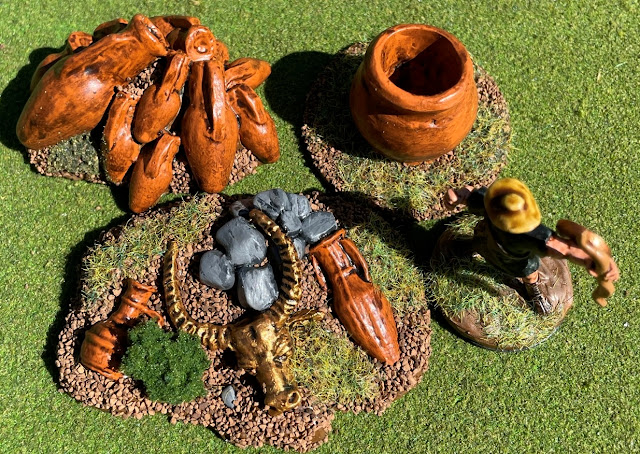
Clockwise from top left are a stack of amphorae, a large pot which came without a base (I glued it to a 40mm round base), a 28mm Cretan archer guarding the loot and showing the scale, and my favorite piece which has two half-buried amphorae along with a large bull's head; perhaps a relic of a collapsed Bronze Age civilization?

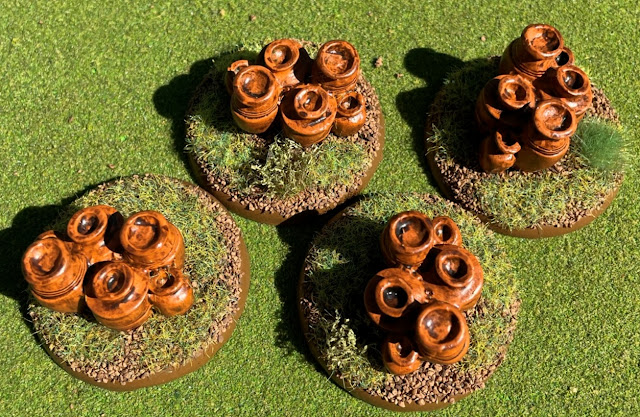
Four identical groups of amphorae.  They came cast on 40mm bases which are the perfect size for objective markers.        

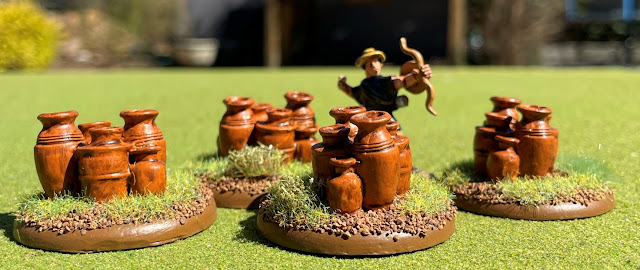
With a 28mm Cretan archer to show scale.

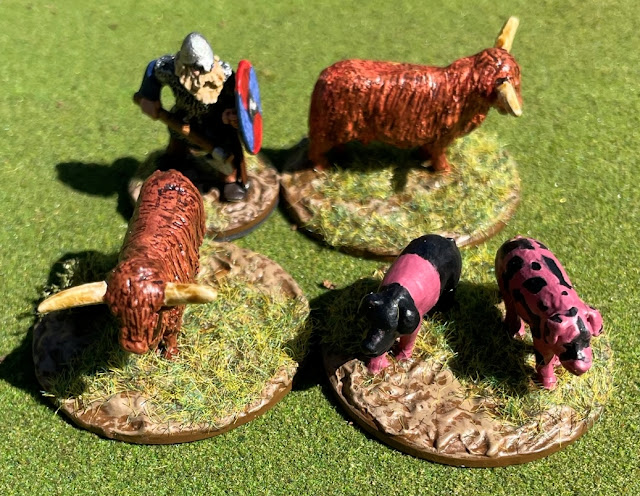
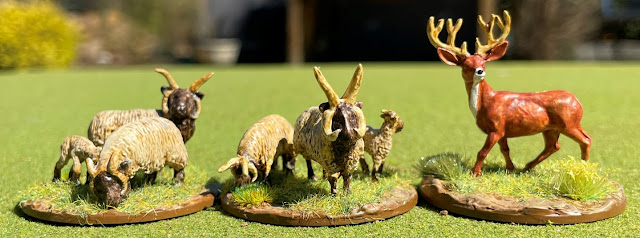
I needed six bases of livestock.  I already had 2 Highland Cattle and 2 pigs from Irregular Miniatures that my daughter had painted for me in 2014 for use in Saga 1st edition.  They were on different size bases so all I had to do was rebase them.  The Highland Cattle got a coat of Iron Wind Red Brown, followed by a drybrush of Howard Hues Mideast Flesh, then a brown wash.  When my daughter painted the pigs, we googled English heritage pig breeds and she picked the Wessex Saddleback (l) and the Gloucestershire Old Spot (r).  A Viking is attempting to rustle them.


I had a pack of 6 Gripping Beast Manx Sheep that I had bought for this purpose and put 3 each on two bases.  For the sixth base I looked through my unpainted miniatures and while I didn't have any more farm animals, I did have 4 deer from Iron Wind/Ral Partha, so I used one of them.    After some quick paint jobs they were finished.

For the Manx sheep, one base was painted Iron Wind Khaki and the other left with the white primer.  Then I used GW contrast paints (Aggaros Dunes or Skeleton Horde), followed by a drybrush of Army Painter Skeleton Bone.  The lower legs and faces got a wash of dark brown.  Now that they're finished, I can't tell which base was painted khaki and which just primed white.

I painted the deer as a European Red Deer with an initial layer of Coat d'Arms Barbarian Leather followed by a wash of GW Doombull Brown to give it a reddish tint like the photos I saw online.  The face and hindquarters got patches of off-white and I used GW contrast Skeleton Horde for the antlers.

Thanks for reading!


07 March, 2022

28mm Samnites and Thureophoroi

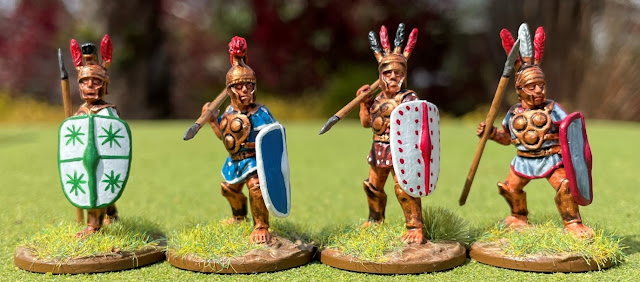
When choosing mercenary units to paint for Saga: Age of Hannibal, the Samnites were a natural choice.  They would provide the Epirotes that I was building a unit that is good in rough terrain, which the Epirote phalangites want to avoid..  I also decided to build the thureophoroi, who besides having some nice special abilities that work well with the Epirote phalanx, should also be usable with some of the armies in the upcoming Age of Alexander book.

For the Samnites, I used the 'Samnites in Triple Disc Armour' pack from Crusader Miniatures because I liked the look of the disc breastplates.  The pack of eight miniatures contained two each of four different bodies and four different heads which resulted in plenty of variety.  While I am not a big fan of separate heads in metal, they fit very well and superglued on securely.  The tunic and shield designs are heavily borrowed from/inspired by two books:

Armies of the Macedonian and Punic Wars by Phil Barker

Caesar's Legions by Nick Sekunda


The Thureophoroi are also from Crusader, the 'Greek Thureophoroi' and 'Greek Thureophoroi Command' packs.  I gave them the white shield that is often seen in depictions from the Hellenistic era.  While the mercenary unit only has 8 figures in Saga, I have 12 in case I want to use them as Epirote levy skirmishers instead.


02 March, 2022

Ruins and Rocky Ground Terrain Pieces

One of my ongoing projects has been to improve my terrain collection.  The primary goal is to cover all the terrain possibilities for my Saga games, though most of the pieces are usable for other games and periods.  In 2021 I bought a set of terrain pieces from Terrains4Games.  Included in the set were 6 area templates that I could use for woods, rocky areas or ruins by placing different pieces on top.  At the end of 2021 I got a bunch of new trees by 4Ground secondhand but unopened.  They are great trees but no longer appear on their website so are likely out of production.

In July 2021 I bought some resin terrain pieces from Acheson Creations.  They have a wide range of items and are my first stop when I am looking for terrain.  The owner is retiring at the end of May so I encourage you to take a look and order something before then.  Part of my order consisted of pieces to use for ruins and rocky areas.  After finishing an army project in late February 2022, I was motivated to paint them.  After running them through the dishwasher on the gentle cycle to remove any mold release, I spray painted everything black.  Next I used thinned black craft paint to cover any areas I missed. 

Hellenistic thureophoroi advancing past eight ruined columns, painted with successively lighter shades if gray until I was satisfied with the look.  The final coat was Vallejo Silver Gray.  The stones surrounding the pillars were painted in various shades of gray.  The columns will also be useful in my Stargate project.

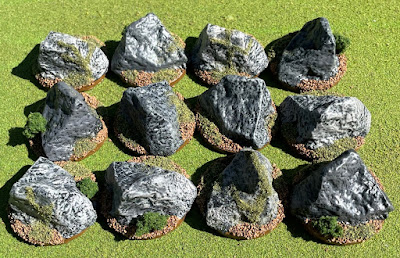
I drybrushed the 12 boulders in various shades of gray craft paint.  Next I coated the base with glue, then dipped them into brown ballast.  When that dried, I used glue to add patches of flock and bushes.


Two of the Terrains4Games templates as rocky areas with boulders and some 28mm Vikings for scale.

Various types of stone walls and pillars.  First drybrushed a dark and medium gray, then I painted some of the individual stones in one of 3-4 different shades of gray for variety.


Two of the Terrains4Games templates as ruins with 28mm Vikings for scale.


29 January, 2022

28mm Factory and Barn

For me, one of the benefits of the lack of wargaming conventions over the last two years has been the discovery of new wargaming companies online.  One example is Father and Son Gaming.

Located in central Ohio where I am originally from, I don't recall how I first found their website in January 2021.  They were very responsive when I emailed with some questions.  When I asked some of my Ohio gaming friends they gave positive recommendations.  They have a nice line of MDF terrain and other gaming accessories.  Many of their buildings are for WWII but can easily be used in other settings.

In February 2021 I ordered three 28mm buildings from them.  After an extended lull in terrain building, over the winter holidays in late 2021 I assembled two of them: a factory and a barn.  The third is still being painted.  Both of the buildings were easy to assemble.  Although they did not come with written instructions, the photos and videos on their website were more than sufficient.  All the parts fit together very well.  The only modification I had to make was on the factory floor pieces where I filed down some of the tabs that fit into the walls.

The factory is a good addition to my modern terrain.  I quickly spray-painted it a medium gray.  I considered making the roof a different color but decided to leave it all the same depressing factory gray.  The photos include three of my biker gang who are doubtlessly guarding all manner of illicit goods.  The large windows work well for gaming purposes.

The roof and upper floor are removable and there is plenty of room for miniatures.  The building also includes a ladder that is hidden in the shadows of a winter afternoon.

The barn did not come with a base piece but the website description is very clear that it does not.  I spray primed it black, then assembled it.  I gave it a quick coat of thinned black paint to cover any spots the primer missed, followed by two coats of Howard Hues Wood, then two drybrush coats of Howard Hues Colonial Khaki.  A coat of GW Agrax Earthshade brought out the detail.  I glued it to a piece of styrene for a base.  I coated the styrene with a 50/50 mix of glue and brown paint, then spread a mix of ballast across the base.  On the exterior I added patches of static grass, various tufts and bushes.  I left the interior as a plain dirt floor.  The final step was two coats of Testors Dullcote.  I am very happy with how it turned out.  It will serve for a variety of periods.  I have left the side and back doors off for the pictures but they can be put in place.  

The bikers are again guarding their stash.  I like how you can see the outline of the biker at the other end of the barn.  There is a loft at one end.