17 November, 2011

28mm Buildings

This post has pictures of two 28mm resin buildings I painted in late October/early November for my Doctor Who Project.  Both buildings are made by Ainsty.  I ordered from them for the first time last summer and they were great to deal with and shipped quickly from the UK to the US.  I washed both buildings with warm soapy water and primed them with Krylon Fusion Black spray, followed by a thin coat of acrylic black to cover any areas that the spray missed.

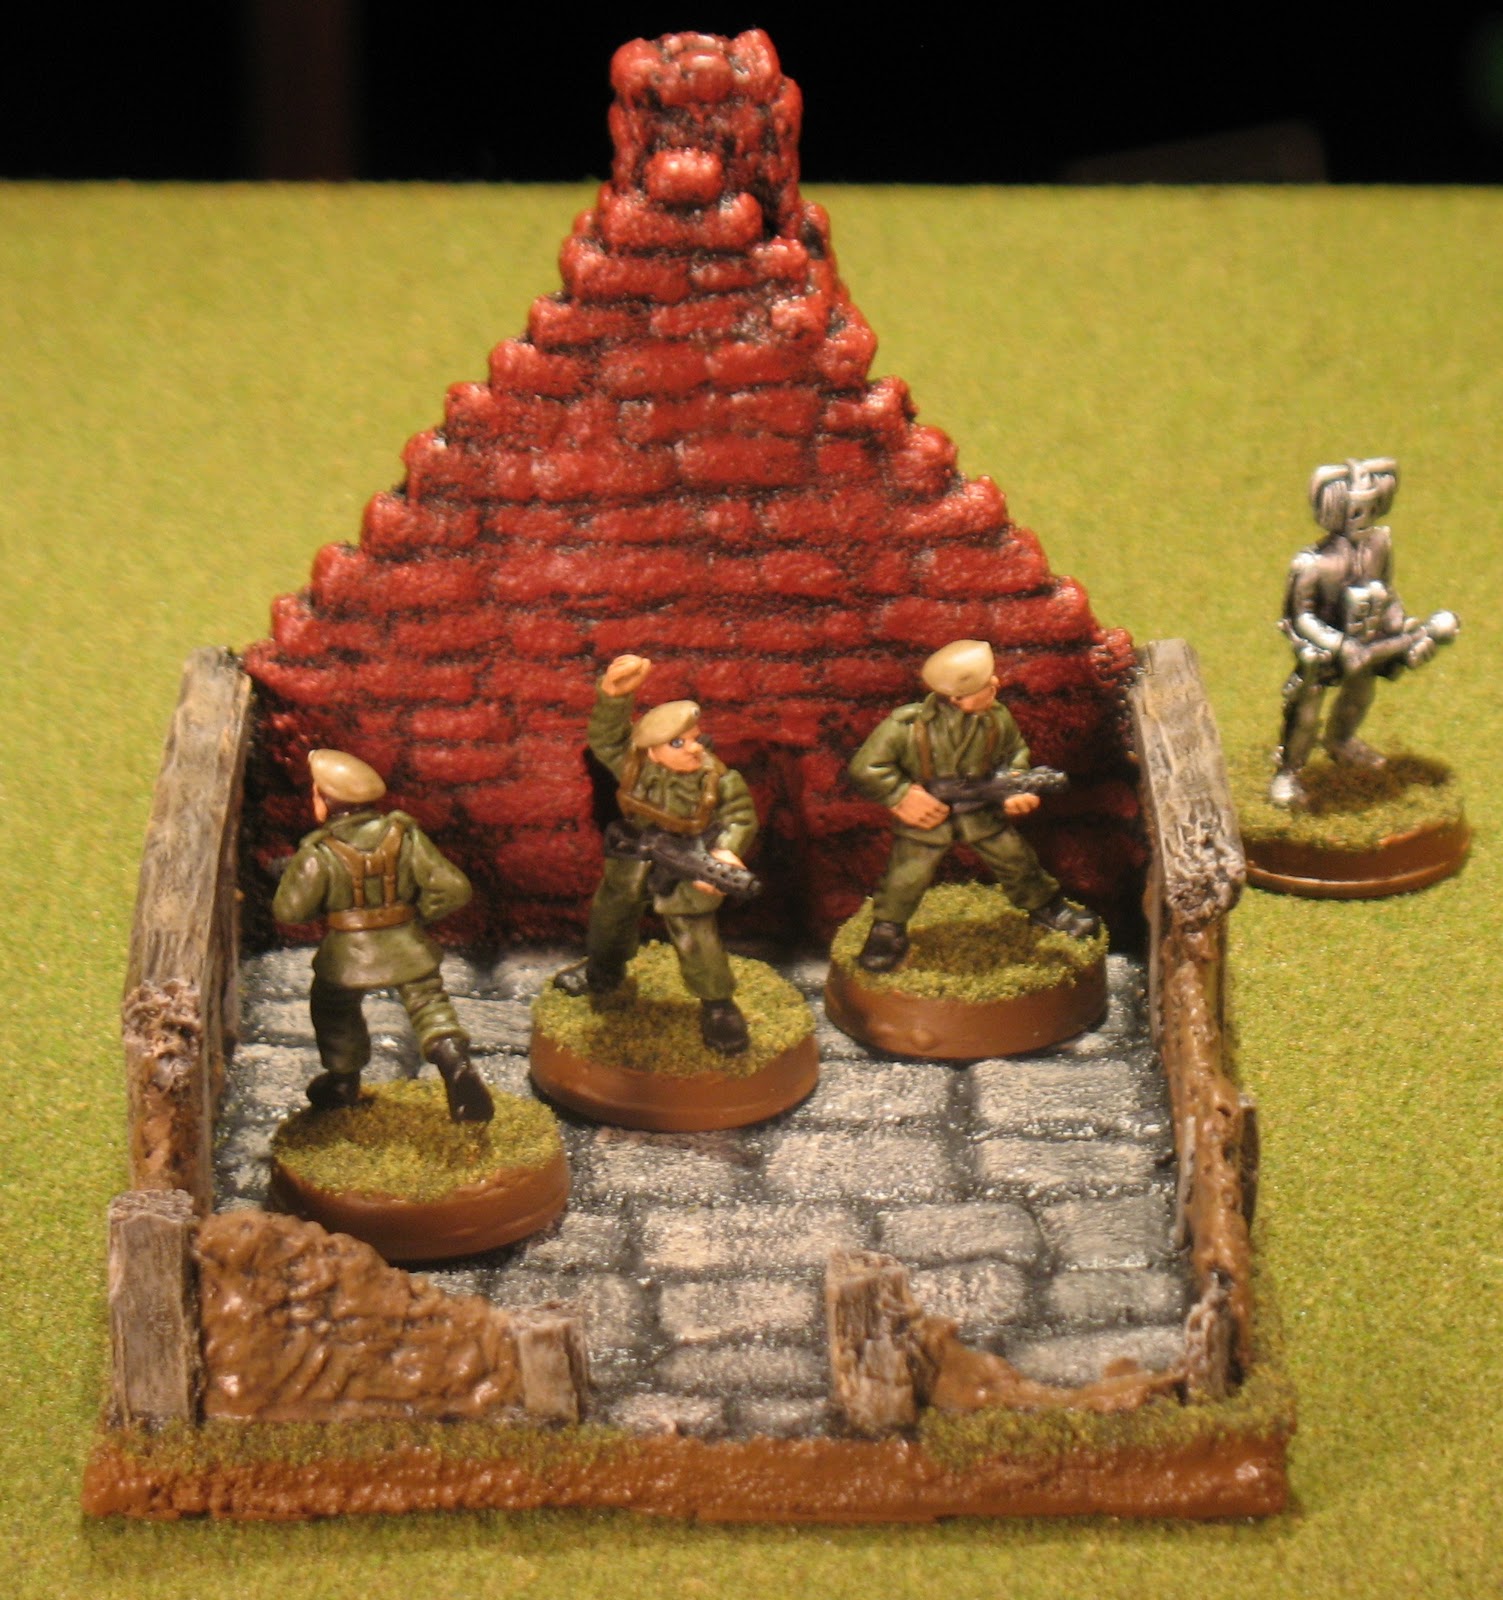
The first building is a ruined cottage.  It is being defended by a group of UNIT soldiers from a Cyberman who is just appearing around the corner.

The chimney is painted in several layers of Americana Heritage Brick.  The wood beams are  painted with a series of drybrushes: Vallejo Medium Camo Brown, then Howard Hues Colonial Khaki, then a light Ral Partha/Iron Wind Grey.  The walls are Privateer Gun Corps Brown and the exposed inner wall bits have a drybrush of Ceramcoat Oyster White over the brown.  The stone floor is painted with Ceramcoat Charcoal Grey, Ceramcoat Storm Grey and finally Ral Partha/Iron Wind Grey.  I finished the model with a black wash and 2 coats of Krylon Matte Finish spray.


The second building is a Security Checkpoint.  I am going to paint something on the sign but I haven't decided what yet.  Two guards from Wolverine Security are manning the post.  The majority of the building is painted with GW Fortress Grey; the blue sections are Vallejo Oxford Blue, which is also the base color for the guards' uniforms.  The roof is removable which comes in handy during games.


Thanks for looking!
Jason

24 October, 2011

Even More Terrain!

I have been working on painting all of the resin terrain I own for my Doctor Who project and have almost finished.  I have 2 small pieces that nearly done.  Over the weekend I primed 2 buildings, a van and a TARDIS.  Then I will be finished.  Of course then I will have to buy more!

All of the terrain pieces in this post are from Acheson Creations, purchased at the last few Cold Wars conventions.  They were all washed in a dishwasher to clean off the mold release agent, primed with Krylon Fusion black spray paint, then a coat of black acrylic paint was brushed on.  The ground on all the pieces was painted Vallejo Flat Earth and flocked green. Finally they were sprayed with 2 coats of Krylon Matte Finish to seal them.

All pictures have 1 of the 28mm scientists from my last post to show the scale.  Click on the pictures for close-ups.

First is a group of oil drums pieces.  The one in the middle is slightly different from the other two.  I gave them a drybrush of Howard Hues Middle East Flesh for a rusty look, followed by a very light drybrush of Howard Hues Colonial Khaki and a black wash.  Howard Hues paints are thick and great for drybrushing.  They also last a long time without drying out, I have some that are over 10-15 years old.  I 'borrowed' the color scheme from my friend and fellow gamer Mike Demana. For a lot of great terrain and miniature pictures & tips, see his website at http://home.earthlink.net/~mikedemanagames/. 


Next are 2 more pieces of oil drums; these have a tarpaulin spread over the drums.  I used the same paint scheme for the drums, while the tarp has several coats of Jo Ann Fabrics craft paint Olive Drab.  I bought that color when I was considering the color scheme for my UNIT troops.  It is thin and doesn't cover very well so this is the first time I've used it.  Both pieces are the same and have opposite sides showing.


Below are 2 pieces of stacked wooden crates.  Both pieces are the same but they are positioned to show opposite sides.  I used 2 drybrushes of Vallejo German Camo Medium Brown, 1 of Howard Hues Colonial Khaki and a final drybrush of Ral Partha/Iron Wind Grey.  They were finished with a black wash and 2 coats of matte spray.  The colors look different, the right-hand piece is much darker.  I painted them at different times so may have done heavier drybrushes on the left-hand one or even left off the black wash.  I suppose it will add a bit more variety to the battlefield.


Next is another version of Acheson's oil drums (on the right) and a set of wooden barrels (on the left). I painted the barrels with the same wood technique as above but left off the final grey drybrush.  The bands are painted with Ral Partha/Iron Wind Steel, one of my all-time favorite colors.


Last are 2 larger pieces, a dead tree and a standing stone.  I originally bought the tree for use in a camp diorama for a 28mm Gallic army.  As the army is still unpainted perhaps it will still be used for that someday!  It is painted with the same wood technique as above.  The standing stone was drybrushed Ceramcoat Charcoal Grey, Ceramcoat Storm Grey and Ral Partha/Iron Wind Grey, followed by the usual black wash.


I will have some free time this week to take pictures, so I may photograph another 15mm army, it's been a while since I've posted one of those.

Thanks for looking!

Jason


20 October, 2011

Doctor Who Project - Scientists

Today's post features a group of 4 28mm scientists for my Doctor Who project.  You can never have too many civilians/hostages/cannon fodder.

The miniature on the left is a Black Tree Designs (ex Harlequin) official DW miniature of Professor Kettlewell.  He was the creator of the Robot in the first 4th Doctor story, 'Robot'.  I based his clothing on scenes viewed on my ancient videotape recorded around 25 years ago.

I believe the other 3 miniatures were manufactured by Brigade Games, but I threw the packaging away a long time ago.  I do know I purchased them in a pack from Brigade at Cold Wars 2010.  The one with the blue blouse appears to be leaning to the right in the first photo but it is due to the angle of the shot.

Paints used were a mix of Vallejo, Coat d'Arms, Howard Hues, Ral Partha/Iron Wind and craft paints. The red and blue also have a wash of the original Citadel inks from the 1990s.

Click for a close-up view.  Here is the front:

A rear view.  Lots of white lab coats!

These were fairly quick to paint.  I intend to get some more scientist types as I come across them.  I have my eye on the 3 scientist set by Crooked Dice as they look very nice.

I took pictures of a bunch of terrain and my Sea Devils at the same time as these photos, so they will be the subjects of my next posts.

Thanks for looking!

Jason

05 October, 2011

Doctor Who Project - Security Guards

This post covers a group of six 28mm security guards for my Doctor Who project.  They are Artizan Designs figures, from their 1960s-inspired Kiss Kiss Bang Bang range.  The packs I used are KKBB204 (Guards) and KKBB 206 (Guards II).  I purchased them from Brigade Games at Cold Wars 2011.  That is a quick turnaround for me!

I'll be using these figures for various purposes in my games, from security guards to mercenaries to unwitting tools of alien invaders. 

When I was deciding the color scheme, I chose blue for the jumpsuits.  Five of the 6 figures have a triangle insignia on the right arm, which I painted yellow.  I am a life-long Ohio State Buckeyes fan, and their archrivals are the Michigan Wolverines, whose colors are blue and yellow.  So it seems fitting to name this group of evildoers 'Wolverine Security'. 

I used a variety of hobby and craft paints, including Vallejo, Ral Partha/Iron Wind, Reaper, Privateer, Howard Hues and Ceramcoat.  The jumpsuits are Vallejo Oxford Blue, with a drybrush of Oxford Blue & White on top.  The final step in painting is a black wash.  My first application of Krylon Matte Finish spray resulted in the dreaded 'frost'.  It was removed with a coat of brush-on gloss finish, followed by a repaint of the guns and boots.  Two coats of matte spray under less humid conditions, from the same spraycan, and they were done.  The figures are all based on slottabases, with metal washers attached on the bottom with epoxy for storage on magnetic sheeting.

I have mixed the 2 packs together and am not sure which figures came in each pack.  First group of 3 guards:


Second group of 3 guards:


I like how they turned out.  I may add some more figures to Wolverine Security in the future, once I have cleared some of my painting backlog.

For my games I use the Doctor Who Miniatures Game (DWMG) rules, available for free on the internet at http://www.drwhominiatures.co.uk/ and with an active Yahoo group.

Thanks for looking!

Jason

04 October, 2011

More 28mm Terrain

I have finished some more resin terrain pieces for my Doctor Who project. 

Before I get to the new stuff, I realized after my last post that I neglected to include a figure in the photos to show scale.  So below is a picture with a selection of the boxes from that post, along with a 28mm Artizan figure.


Next are the new pieces I painted last week.  These 3 pieces will form a small graveyard.  They are all from Acheson Creations, purchased at Cold Wars 2010 or 2011.  To prep them and to remove the mold release agent, I washed them in the top rack of the dishwasher (minus the heated drying cycle).  Then I primed them with Krylon Black Fusion spray paint, followed by a thin coat of acrylic black. 

I used a series of 3 drybrushes: Ceramcoat Charcoal Grey, Ceramcoat Storm Grey and finally Ral Partha/Iron Wind Grey.  The exposed brick was painted in Americana Heritage Brick.  The bushes were given a coat of Armory Medium Green and a wash of the original Citadel Green Ink.  Finally I gave them each a coat of black wash, then 2 coats of Krylon Matte Finish spray.

I like how they turned out and will probably get a few more pieces from Acheson to expand the graveyard the next time I see them at a convention.  A 28mm Copplestone figure is included for scale.


Thanks for looking!

Jason

18 September, 2011

28mm Terrain

I recently painted some terrain for my Doctor Who project.  As it is my first full 28mm project, I will need a lot of terrain.  This post covers the first of several batches of resin terrain I have underway.

This first batch consists of assorted crates & boxes from Ainsty (http://www.ainsty-castings.co.uk/).  I ordered a variey of items from them in July and received them quickly.  Their resin pieces had little or no mold release agent on them, so I just gave them a quick rinse in warm soapy water.  I then spray painted them with Krylon black fusion primer.  After letting them dry overnight, I gave them a quick coat of acrylic black paint to cover any missed spots.

Before going any farther, I want to note that the method I used on these crates was borrowed from my friend Mike Demana (http://home.earthlink.net/~mikedemanagames/index.html).  For a detailed explanation of how he paints wooden objects, read the July 27, 2011 entry in his Projects section. 

After the black I used a series of drybrushes.  First Vallejo Medium Camo Brown, then Howard Hues Colonial Khaki, then a light Ral Partha/Iron Wind Grey.  I did 2 coats of the Vallejo brown because it is a thinner paint than the HH brown Mike uses and 1 coat didn't cover well enough for my liking.  I then gave them a liberal coat of black wash (actually satin finish with some black paint mixed in).  After a few days to dry, I sprayed them with Krylon matte finish.

The first picture is 2 large & 3 medium crates.

These 5 crates are smaller, and 3 of them have separate lids with guns inside.  I painted the packing material grey, then off-white.  I really like these and may use them as objectives.

Here is a picture from above so you can see the contents.

I am really pleased with how this first batch turned out.  I have several buildings and a police van from Ainsty and a bunch of resin scenery from Acheson Creations that I plan on painting over the next month.  Now that the South Carolina weather has cooled off a bit, I can spray outside again.  I have some completed figures for my Doctor Who project that I will be taking pictures of soon.

Until then, thanks for looking!

Jason

21 August, 2011

Back in Action

After a long hiatus this blog is active again.  My painting this summer has alternated between bursts of activity and weeks where nothing gets done.  Vacations, work, kids, all have absorbed my time.  What I have painted has piled up waiting to be varnished for 2 reasons:  with little free time, I want to paint, not spend time sealing; and the summer heat and humidity in South Carolina prevent me from using any sprays outside.

I did spend Saturday night clearing up most of the varnish backlog.  Now I can get the figures based and clear some room from my workspace.


On the left are figures for my Medieval Ireland project: Scots pikemen, various Irish and English billmen.  The middle is an army of Hobbits (Splintered Light figures) for HOTT.  The right has 2 units (6 figures each) of commanded shot, one with yellow coats and one with blue, for my English Civil War Royalists.  The 28mm figures in the front are for my Doctor Who project (l-r): a Sea Devil, 2 versions of the Master, the 3rd Doctor, 3 scientists and a Silurian lurking behind them.  there are a couple dozen more Sea Devils in the storage tray underneath the sheet of styrene.

I have some armies lined up to take pictures of, so expect more posts soon.  My painting plans for the near future include the last few foot figures for my Medieval Ireland project (already underway) and a bunch of terrain I bought this summer from Ainsty.

Thanks for looking!
Jason

06 March, 2011

Ancient Spanish

This post covers my 15mm Ancient Spanish army (List II/39a/b/c 240-20BC in DBA).  I painted it in several tranches over a number of years.  The first 4 stands of scutarii were painted as part of a triple-size (aka Big Battle) DBA Later Carthaginian army in the early 2000s.  Then in Summer 2008 or early 2009, I started painting 24 more scutarii.  My idea was to add the Spanish to my Punic Wars collection, consisting of the already mentioned Carthaginians, a triple-size Gallic army, and a Polybian Roman army http://mirosgames.blogspot.com/2009/07/polybian-romans.html

and to be able to field 2 of the 3 Spanish sublists at once to use as allies of Carthage and/or Rome.  I painted most of the base colors, lost interest in the project, and stored them in a box.  Fast forward to Christmas 2010.  Over the break I decided to try and complete some unfinished projects, starting with the Spanish.  I quickly completed the scutarii, and then moved on to 6 stands of caetrati and 4 stands of cavalry.  The last figures were completed on January 17, 2011 and they were based and flocked over the last week.  The caetrati and cavalry are all Essex figures.  The scutarii are a mix of Essex, Freikorps, Corvus Belli and Chariot.  The original 4 stands of scutarii have been pulled off of their old bases and mixed in with the newer figures.  I have some Baelaric slingers as well, but they will appear in a future post covering my Carthaginian army.

Not the fanciest army, but I am glad that they are finally done!

Click on the pictures for close-ups.

The first group of 6 scutarii:


The second group of 6 scutarii:


Six stands of caetrati skirmishers:


Two stands of light cavalry:
 The figure in the front right has one of my favorite shields.

Two generals:


The entire army assembled (22 elements):

Thanks for looking!
Jason

10 January, 2011

Doctor Who Project - UNIT

This post covers my UNIT force for Doctor Who games.  UNIT (United Nations Intelligence Taskforce) is a multinational force whose purpose is to investigate extraterrestial/paranormal threats to Earth.  UNIT's heyday was during the period of the 3rd Doctor and early 4th Doctor in the 1970s.  They have made sporadic appearances since then, including in the new series.  I use the Doctor Who Miniatures Game (DWMG) rules, available for free on the internet at http://www.drwhominiatures.co.uk/ and with an active Yahoo group.

My UNIT troops are painted in a mid-1970s uniform, though I have no qualms over using them in any scenario calling for UNIT, no matter the date.  It is no coincidence that is the time when I first started watching Doctor Who as a young boy on WOSU, the local PBS television station in Columbus, Ohio, USA where I grew up.  It is often said among fans that your favorite Doctor is always the first one you saw.  In my case that was Tom Baker, the 4th Doctor.  When I was in elementary through high school, WOSU showed Doctor Who on a regular basis, originally with one 25-minute episode each weeknight and a whole story on Sunday mornings.  I have fond memories of watching while my mom cooked dinner and of getting up early on Sundays to watch.  In later years, 1-2 stories were broadcast in their entirety on Saturday nights.

My UNIT force consists of 42 figures; most are from the Doctor Who range manufactured by Black Tree Design.  They were painted in batches from 2007-10.  I only bought six of the regular soldiers directly from BTD, which came in the Invasion Earth box set; the officer figures also came direct from BTD, while the rest were purchased over a long period of time off of Ebay.  There are a few figures from other manufacturers that I will note in the individual photos.  Several manufacturers offer Falklands-era British that can be used as UNIT troops.  For the purposes of this post, I have divided them into four squads, plus heavy weapons support and officers.  They are on slottabases with metal washers underneath to provide balance and for use in my magnetic storage system.

You can click on the photos for close-ups.

The 1st squad of seven:

The 2nd squad of six:

The 3rd squad of seven:

The 4th squad of seven:

Support sections (l-r): a 2-man bazooka team (BTD), a 2-man machine-gun team (BTD) and a 3-man mortar team (The Assault Group, purchased from Scale Creep at Cold Wars 2009).


Officers (l-r): Sergeant Benton, Brigadier Lethbridge-Stewart , and Captain Yates


This is actually one of the 4th Doctor's companions, Harry Sullivan, who appeared on the show during seasons 12 and 13 in the mid-1970s.  He was a Royal Navy surgeon attached to UNIT.  I found this figure in the UNIT box although he should be stored elsewhere, so I decided to take a picture anyway.  Consider this a preview of the Doctors & Companions post!

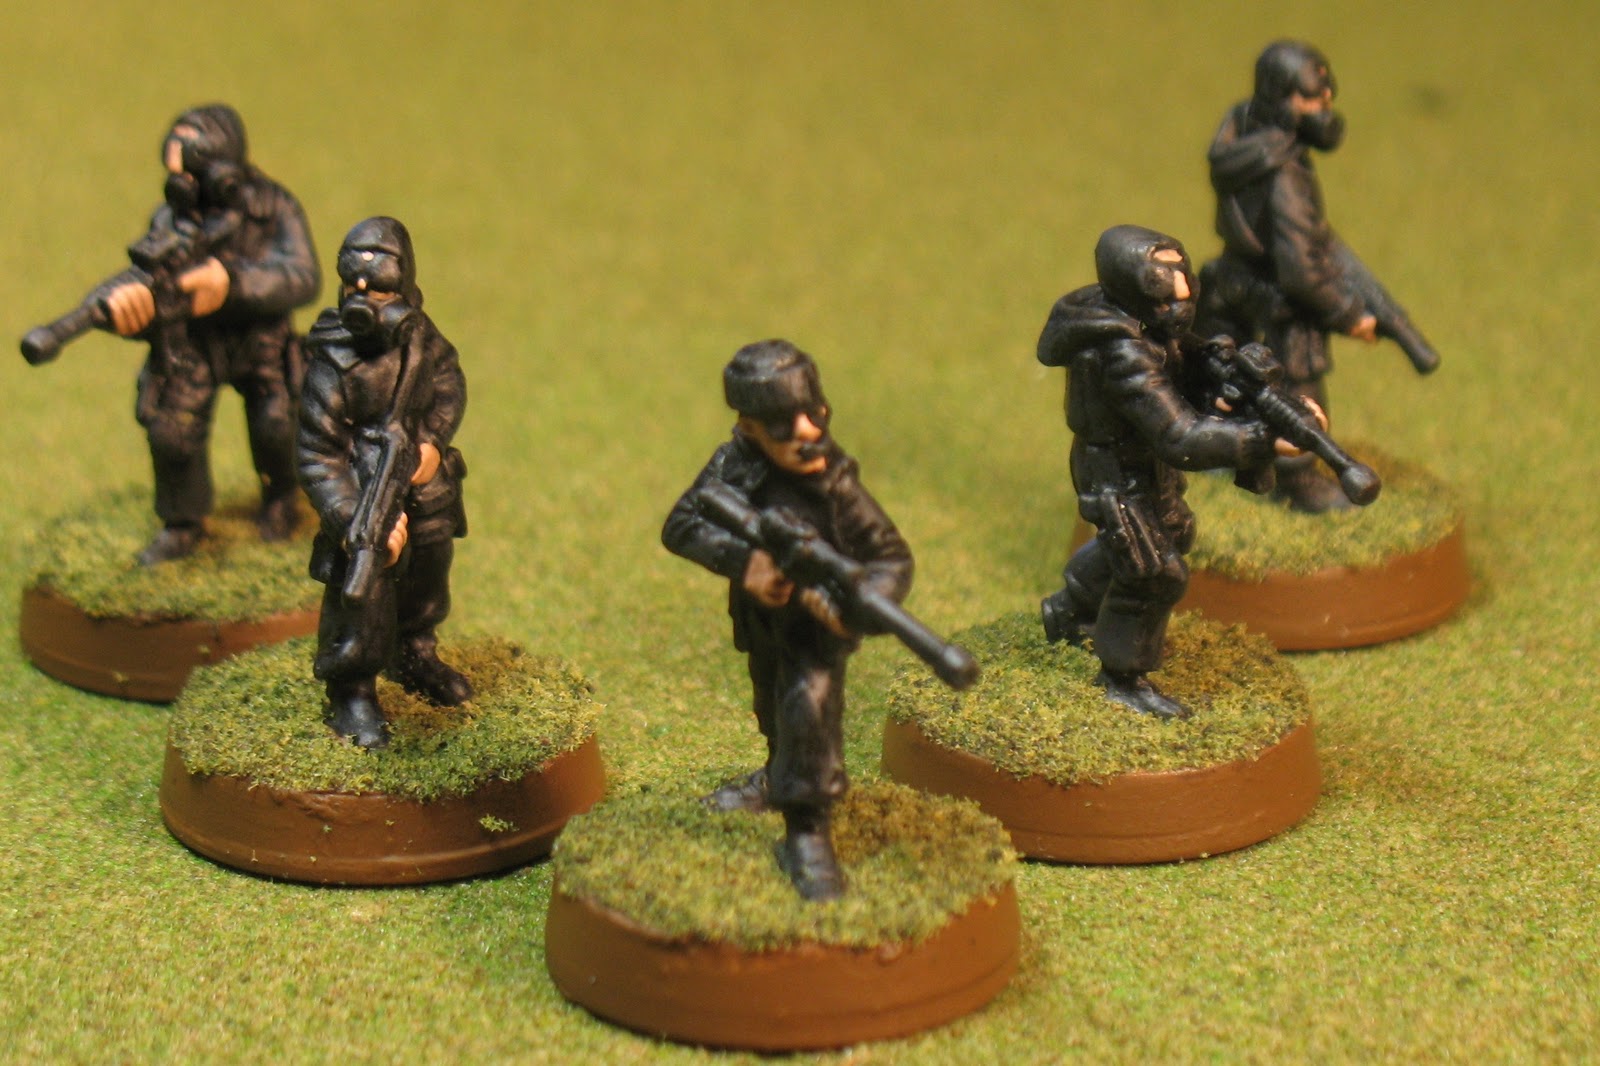
The last squad consists of 5 SAS soldiers.  I purchased them from Rebel Minis at the Cold Wars convention in the 2006-8 time period.  They were painted in 2010.

Finally, here is a group shot of all 42 UNIT soldiers, plus the Harry Sullivan figure.  This is the largest of my Doctor Who forces, which is just well.  They need numbers, as the UNIT troops are normally outclassed in the DWMG rules by the various alien opponents.  Although the DWMG does not have a point system, on the Yahoo group there are references to each alien being worth 'x' UNIT soldiers in order to balance scenarios!

I hope you have enjoyed this series of posts on my long-running project which is finally coming to fruition.  Future posts will feature various Doctors and their Companions, civilians, the Sea Devils and everyone's favorite villains, the Daleks.

Jason